> For the complete documentation index, see [llms.txt](https://docs.seldon.ai/seldon-enterprise-platform/llms.txt). Markdown versions of documentation pages are available by appending `.md` to page URLs; this page is available as [Markdown](https://docs.seldon.ai/seldon-enterprise-platform/demos/seldon-core-v2/batch-requests.md).
# Batch Prediction Jobs
## Pre-requisites
* Install [MinIO](/seldon-enterprise-platform/production-environment/minio.md) with Seldon Enterprise Platform.
{% hint style="info" %}
**Note**: For trial accounts, the credentials default to the Seldon Enterprise Platform login, with MinIO using the email as the `Access Key` and the password as the `Secret Key`. Alternatively, you can specify other cloud storage services, such as S3 and GCS, by configuring the appropriate secret files.
{% endhint %}
* Set up the namespace with a service account for a production environment. For more information, see the [argo install](/seldon-enterprise-platform/production-environment/argo-workflows.md).
This demo helps you learn about:
* Deploying a pipeline with a pretrained SKlearn iris model
* Running a batch job to get predictions
* Checking the output
## Create a Pipeline
1. Click the **Create new deployment** in the **Overview** page.
2. Enter the deployment details as follows:
* **Name**: batch-demo
* **Namespace**: seldon
* **Type**: Seldon ML Pipeline

3. Configure the default predictor values for only these fields:
* **Runtime**: Scikit Learn
* **Model URI**: `gs://seldon-models/scv2/samples/mlserver_1.6.0/iris-sklearn`
* **Model Project**: default
4. Click **Next** for the remaining pages of the wizard, then click **Launch**.
5. When the deployment is launched successfully, in the **Overview** page the status reads **Available** for the deployment.
## Setup Input Data
1. Download the input data file `iris-input.txt`. The format for the `iris-input.txt` is Open Inference Protocol.
{% file src="/files/Qi4S4WN1pmFcQI74lZ8p" %}
2. Go to the MinIO browser and create a bucket named `data`.
3. Upload the `iris-input.txt` file to the `data` bucket.
## Run a Batch Job
1. Click the new pipeline **batch-demo** tile in the **Overview** page.
2. Click the **Batch Jobs** option the left pane.
3. Click **Create Your First Job** and type the following details:
* Input Data Location: `minio://data/iris-input.txt`
* Output Data Location: `minio://data/iris-output-{{workflow.name}}.txt`
* Number of Workers: *5*
* Number of Retries: *3*
* Batch Size: *10*
* Minimum Batch Wait Interval (sec): *0*
* Method: *Predict*
* Transport Protocol: *REST*
* Input Data Type: *Open Inference Protocol (OIP)*
* Object Store Secret Name: *minio-bucket-envvars*
{% hint style="info" %}
**Note**: Here `minio-bucket-envvars` is a [pre-created secret](https://github.com/SeldonIO/testing-gitbook/blob/v2.4/operations/storage-initializers/README.md#configuration) in the same namespace as the model, containing environment variables.
{% endhint %}
{% hint style="info" %}
**Note**: In the `Resources (Optional)` section, you can specify how much memory and CPU are allocated to the containers in this specific batch job workflow. If no values are set on this form, the default values specified in Helm values will be used. Refer to the [Kubernetes documentation on requests and limits](https://kubernetes.io/docs/concepts/configuration/manage-resources-containers/#requests-and-limits) for details.
{% endhint %}
Expand to see batch job setup
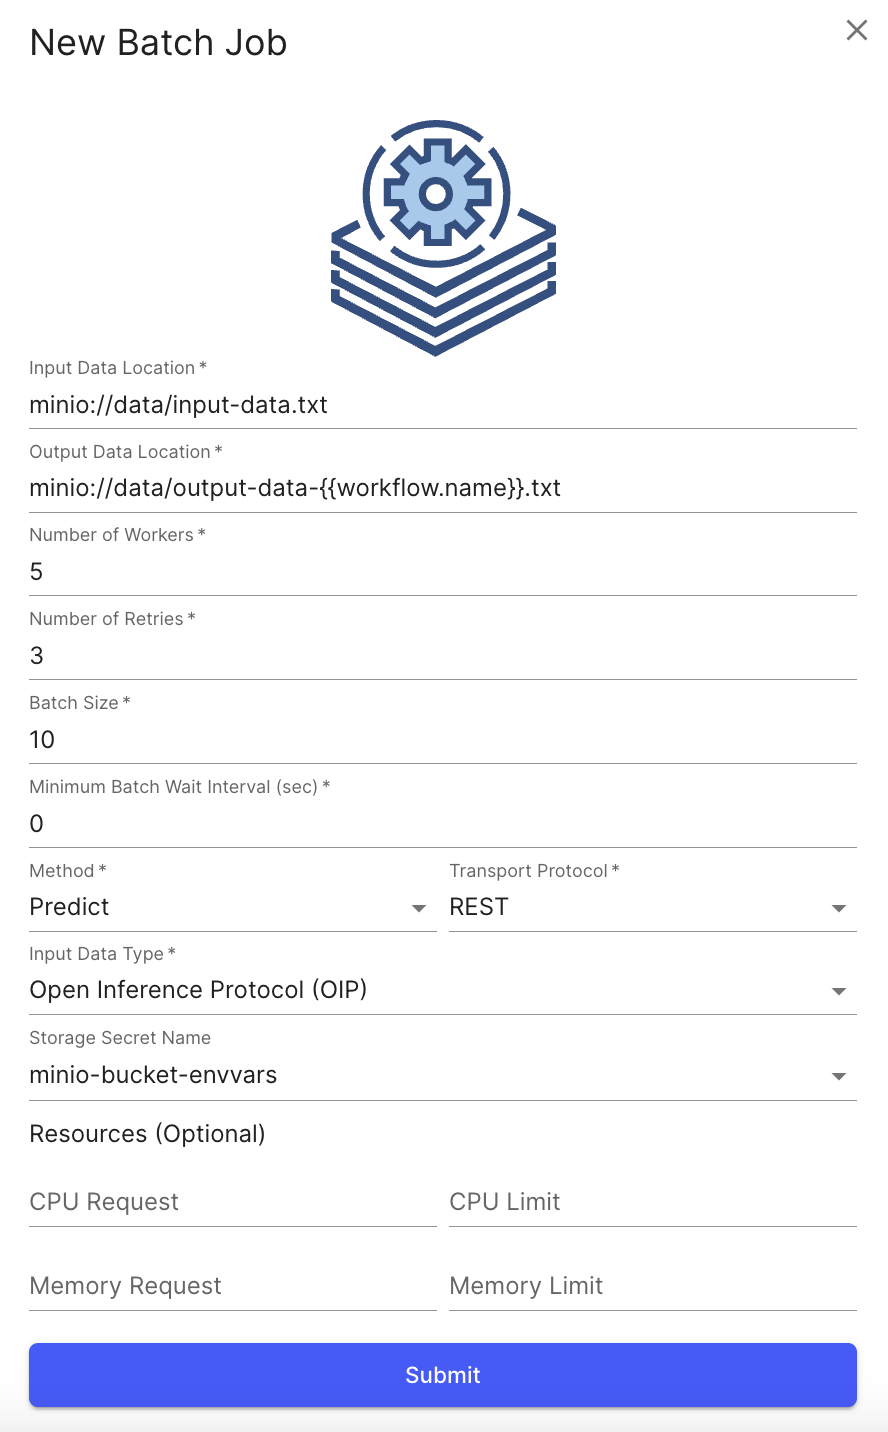
4\. After a couple of minutes when the job is complete, refresh the page to see the status.
Expand to see batch job status
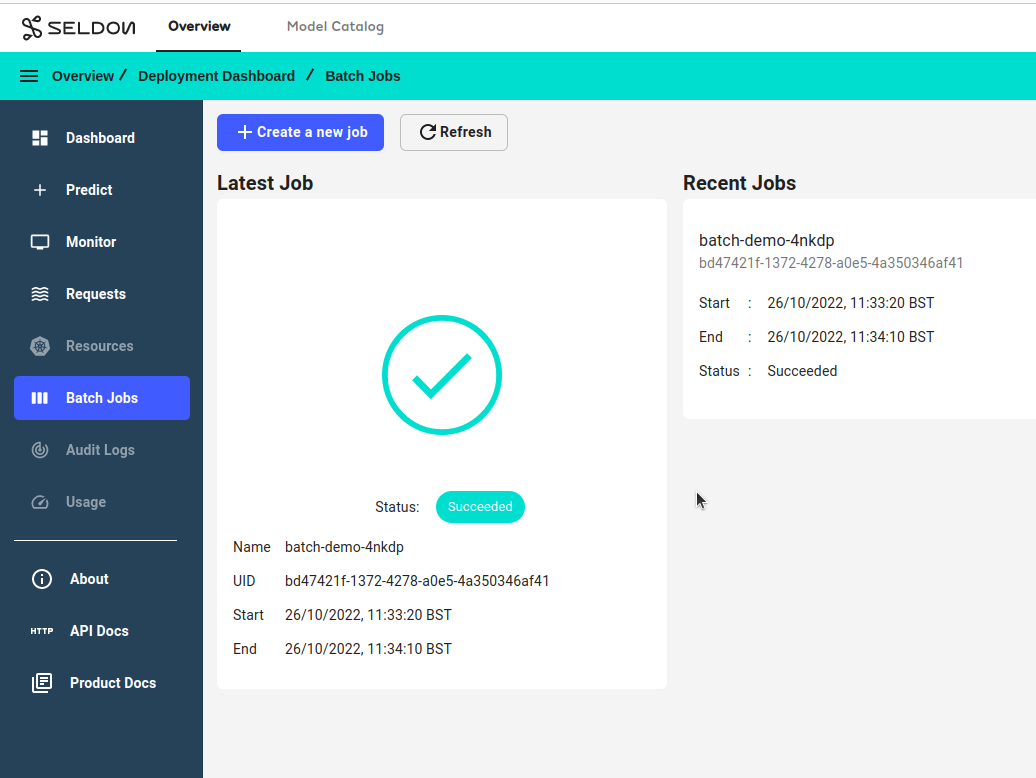
5\. Inspect the output file in MinIO:
Expand to see MinIO output file

If you open the output file you should see contents such as:
```
{"model_name":"","outputs":[{"data":[0],"name":"predict","shape":[1],"datatype":"INT64"}],"parameters":{"batch_index":0}}
{"model_name":"","outputs":[{"data":[0],"name":"predict","shape":[1],"datatype":"INT64"}],"parameters":{"batch_index":2}}
{"model_name":"","outputs":[{"data":[1],"name":"predict","shape":[1],"datatype":"INT64"}],"parameters":{"batch_index":4}}
{"model_name":"","outputs":[{"data":[0],"name":"predict","shape":[1],"datatype":"INT64"}],"parameters":{"batch_index":1}}
```
If not, see the [argo section](/seldon-enterprise-platform/production-environment/argo-workflows.md) for troubleshooting.